How to create your online store with Vendroad
Getting your store up and running on Vendroad starts with a few basic details. This guide walks you through setting up your store, starting with name, URL, tagline, and address.
Step 1: Enter your store details (name, URL, tagline, address)
After signing up and logging in, you'll be taken through an onboarding flow. The first of what is required is entering your store details.
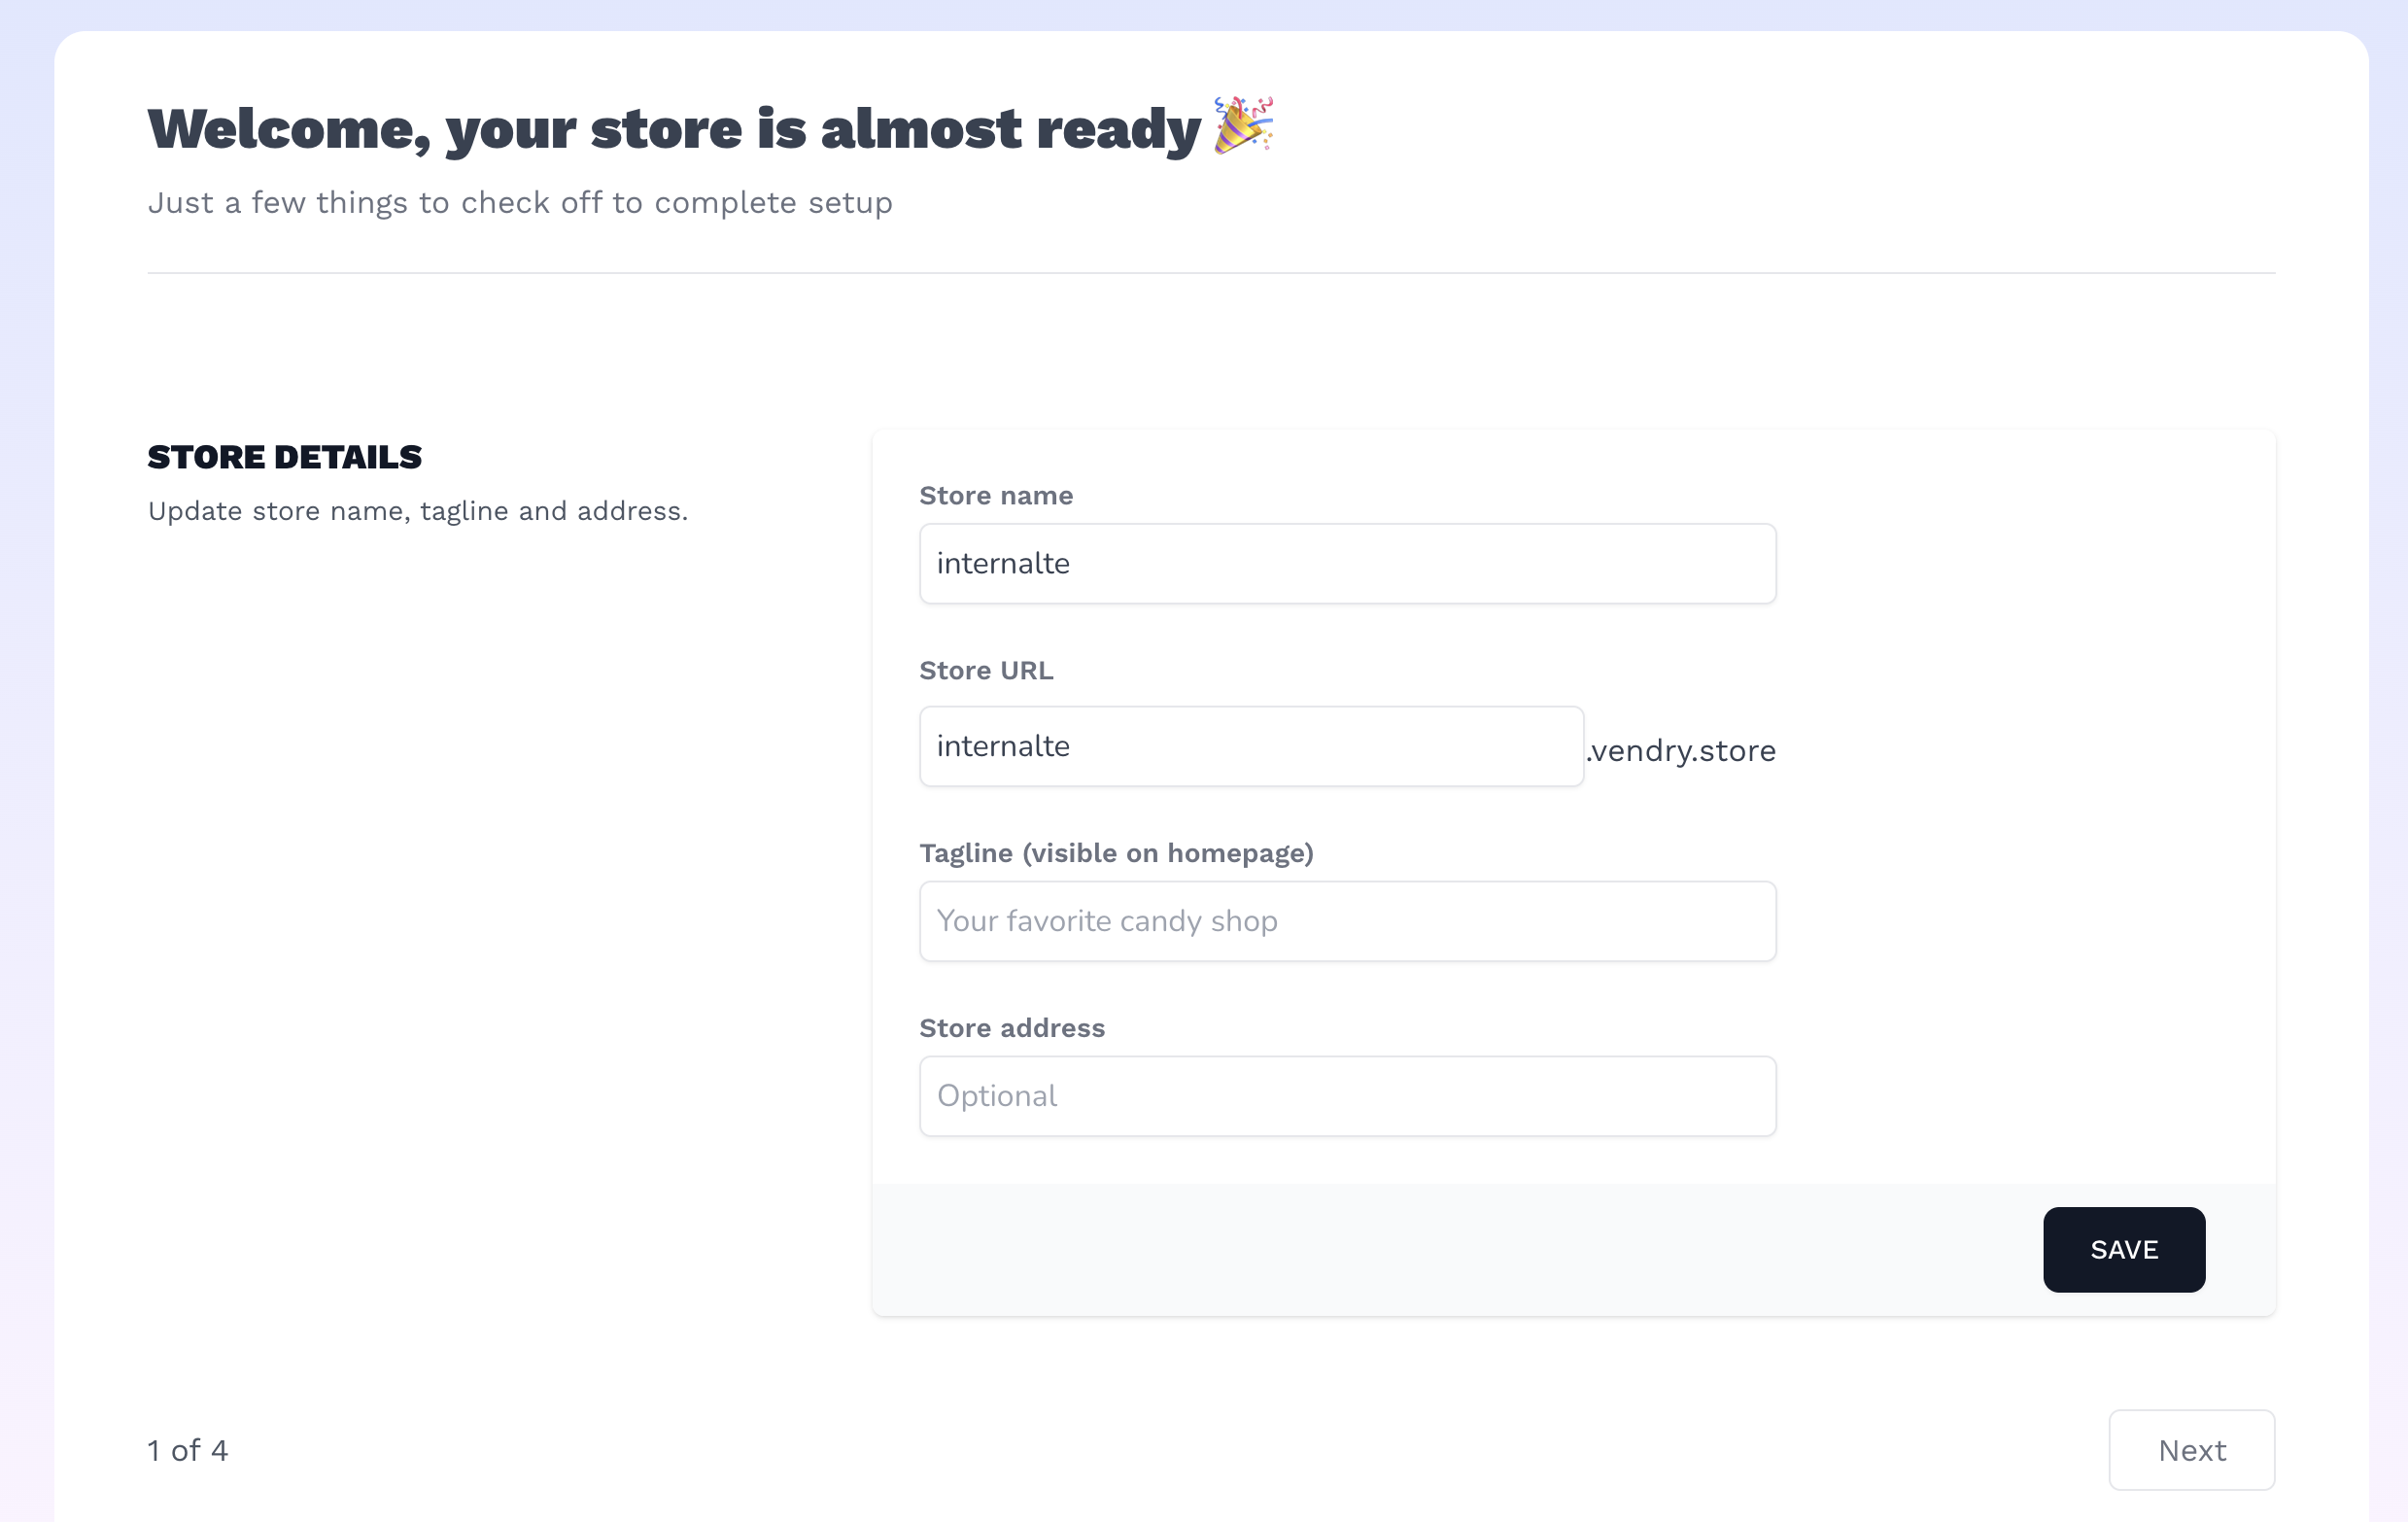
Enter your store name, url, tagline and optionally store address
1. Set up your store name
This is how customers will identify your business. Enter it in the Store name field. Keep it clear and memorable.
2. Set up your store URL
Your store URL is the web address customers will use to visit your store. It will appear as: yourname.vendry.store.
A few rules for your URL:
- Lowercase letters, numbers, hyphens (-) and underscores (_) only
- No spaces or special characters
- Cannot start or end with a hyphen or underscore
For example, if your store is called Sweet Treats, your URL could be sweet-treats.
3. Add a tagline
Your tagline is a short description that appears on your store homepage. Think of it as a one-liner that tells visitors what your store is about.
Example: "Handmade jewelry for every occasion"
4. Add your store address (optional)
If you have a physical location, you can add it here. This is optional but useful if customers need to find or contact you in person.
5. Save your changes
Click Save when you're done. Your store details will be updated immediately.
What's next? Now that your store info is set up, the next step is to set up your branding — your logo, colors, and fonts. → How to set up your store branding