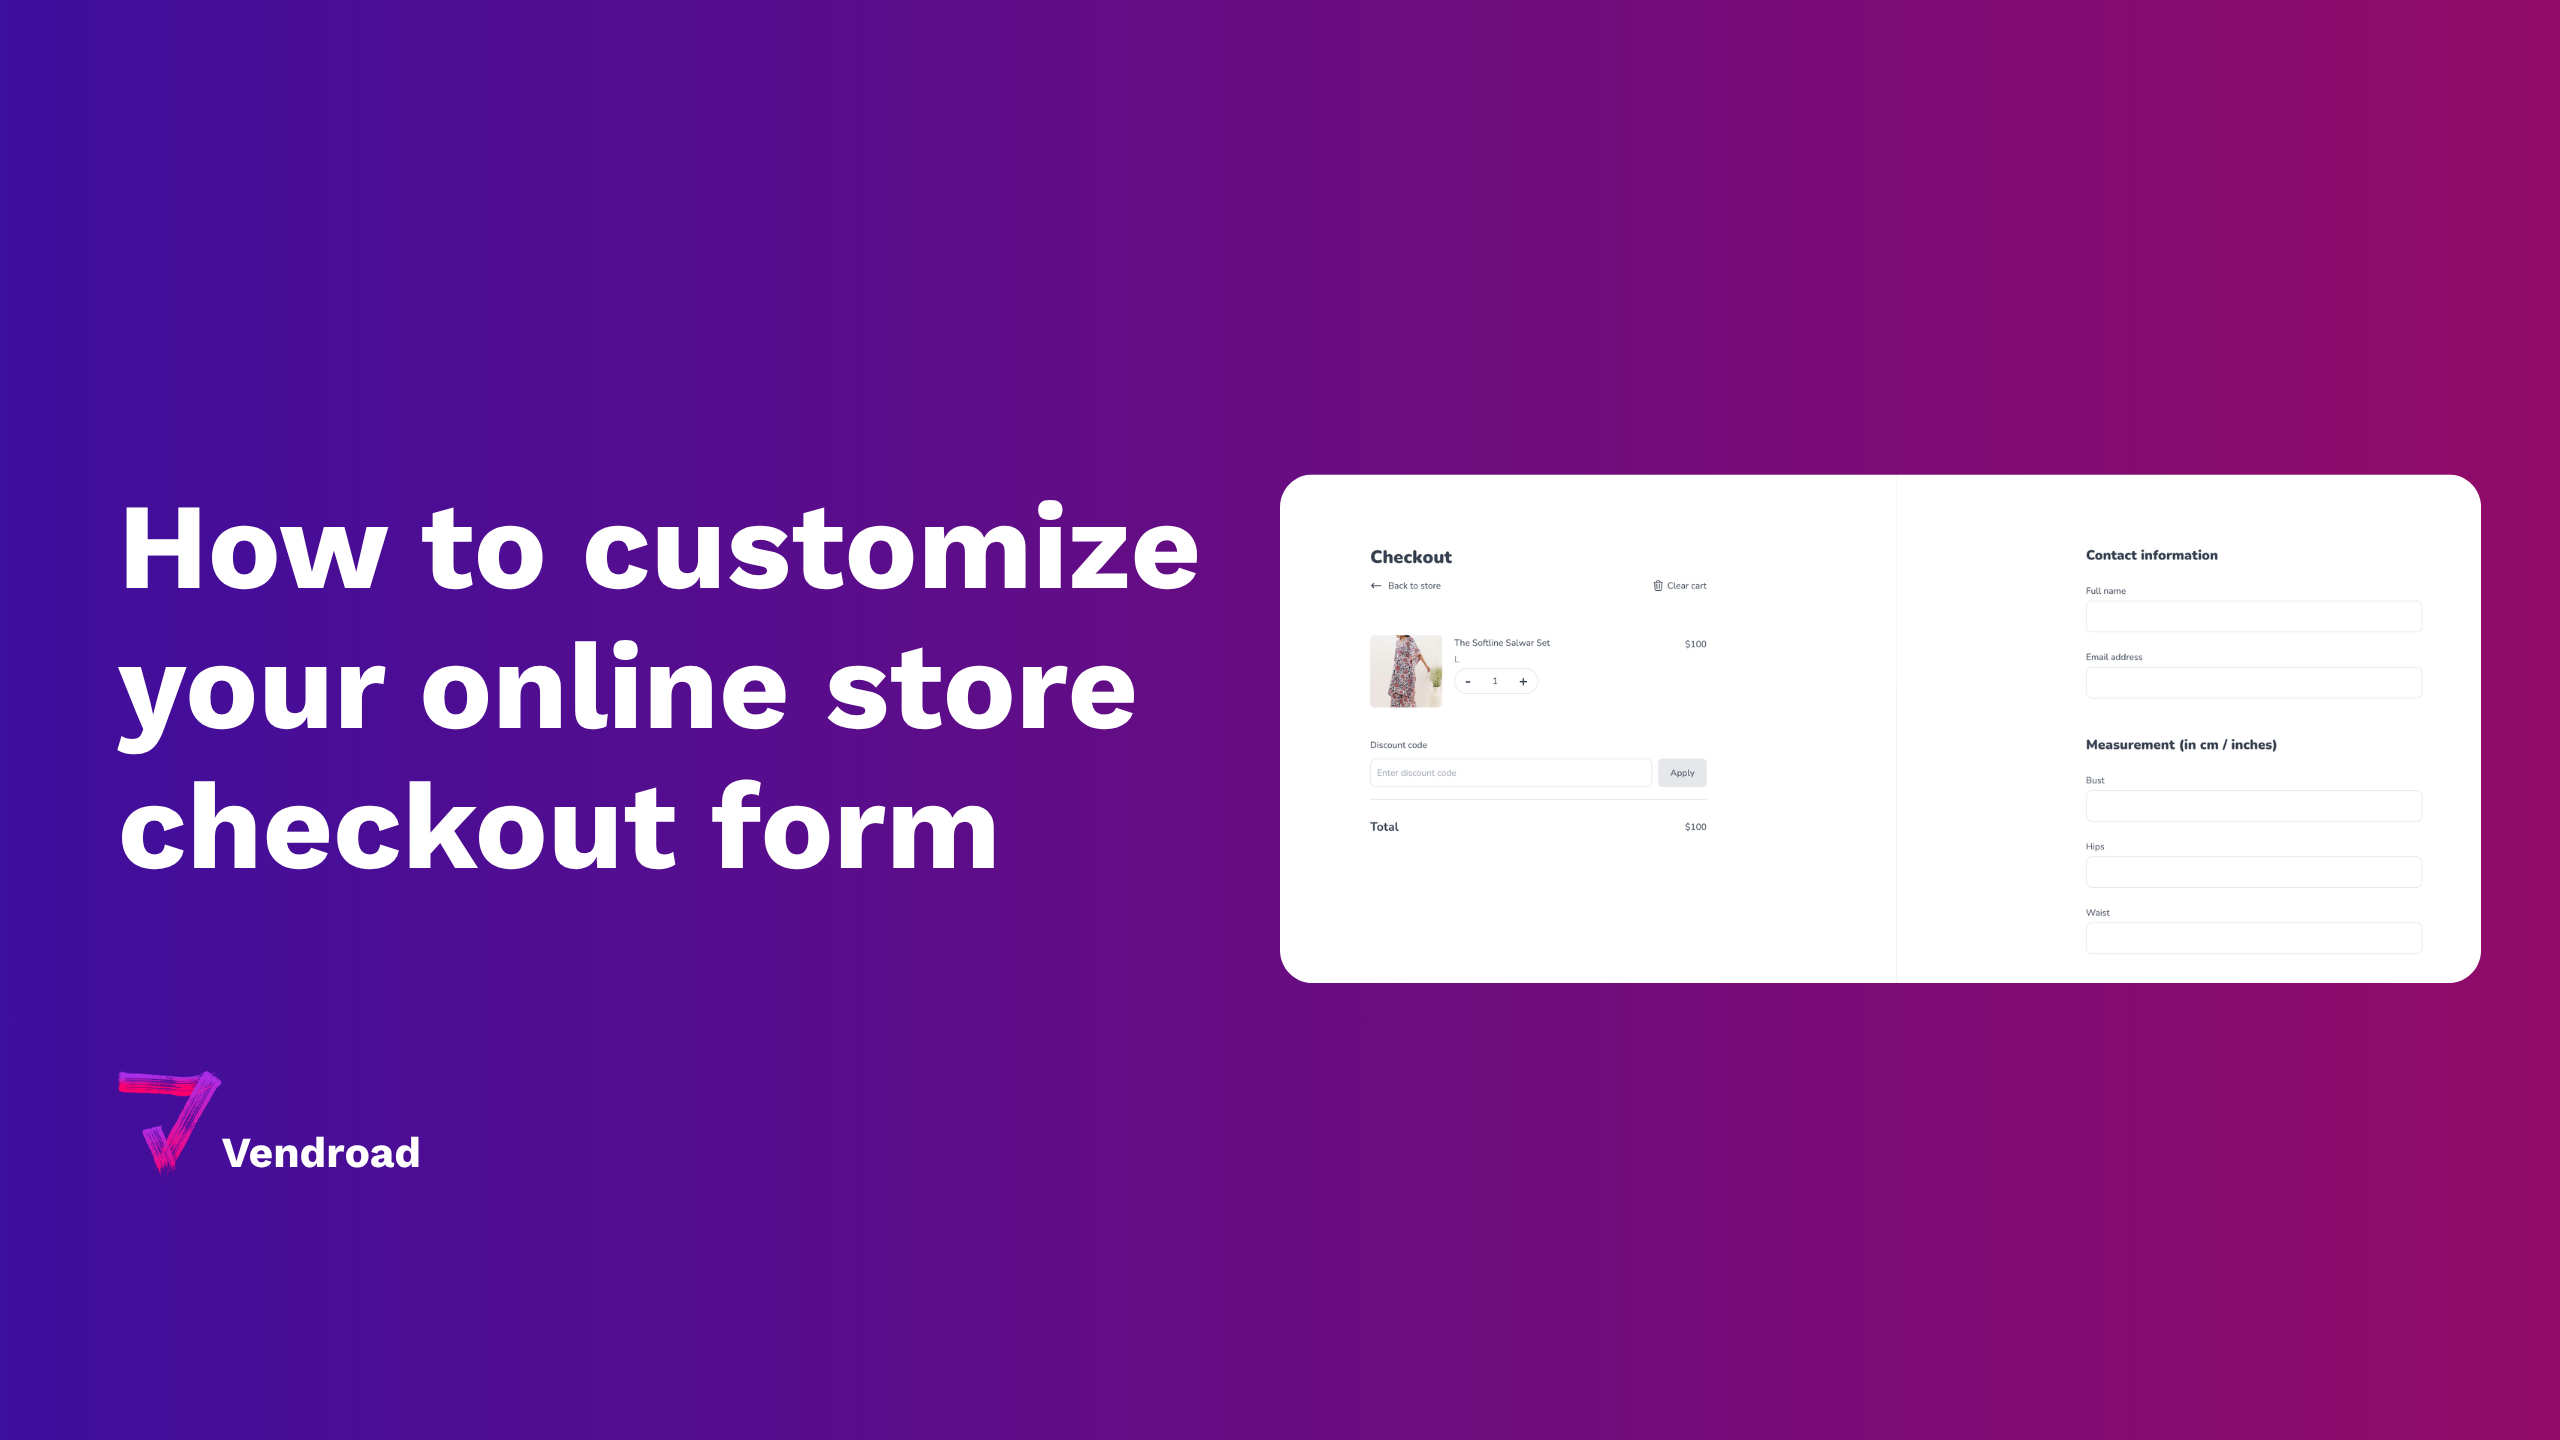
How to Create an Ecommerce Website for Free (Step-by-Step)
You don't need to spend money to launch an online store. Several platforms let you create a fully functional ecommerce website for free, with real products, real payments, and a real checkout, no credit card required, no free trial that expires.
The catch is knowing what "free" actually means on each platform, and which one gives you the most without asking you to upgrade. This guide walks you through exactly what you can build for free and takes you step-by-step through launching your first store in under an hour.
What you'll have at the end of this guide: A live ecommerce website with products listed, payments enabled, shipping configured, and a store URL you can share, all without spending a penny.
What Can You Actually Build for Free?
Free ecommerce plans vary a lot. Some are genuinely free — a permanent plan with real features, no expiry. Others are free trials that give you full access for 14 days, then charge you. Others have a free tier but gate the payment feature (meaning you can build a store but can't take money), which is useless.
Before choosing a platform, check three things:
- Is the free plan permanent, or a trial? You want a plan that stays free indefinitely, not one that locks you out after two weeks.
- Can you accept payments on the free plan? Some platforms require a paid subscription before you can connect a payment method. A store that can't take money is just a catalogue.
- How many products can you list? Free plans typically cap product count. Five to ten products is workable for a new store. Less than five is limiting.
Vendroad's free plan is permanently free, includes up to 5 products, accepts payments via Stripe (credit/debit cards, Apple Pay, Google Pay), and includes shipping, discount codes, chat integration, and built-in SEO, no credit card required to start.
That's the platform this guide uses, because it's the most complete free ecommerce plan available for small businesses right now.
What You'll Need Before You Start
Before opening the builder, have these ready. It'll make the setup faster and your store look more professional from day one.
Your products (up to 5 on the free plan)
- Product name and description for each item
- At least one photo per product — clean, well-lit, ideally square or landscape
- Price and any variations (sizes, colours, materials)
- Stock quantity if you want to track inventory
Basic store information
- Your store name
- A short tagline or description (one or two sentences about what you sell)
- A logo, or at minimum a text-based store name you're happy with
Payment setup
- A Stripe account (free to create at stripe.com if you don't have one)
- Your bank account details to receive payouts
Shipping information
- Where you ship to
- How much you charge for shipping (flat rate, free, or by product)
You can fill in the gaps later, but having this ready now means you'll have a complete, launch-ready store by the end of this guide.
Step 1: Create Your Free Account
Go to vendroad.com/join and sign up with your email address. No credit card is required, you'll be on the free plan by default. You can sign up with either google or email. If you sign up with email, you will be asked to confirm your email.
Once you've confirmed your email, you'll be taken to your store dashboard. This is where you'll manage everything: products, orders, design, settings.
What to do:
- Go to vendroad.com/join
- Enter your email address and create a password
- Confirm your email via the link sent to your inbox
- You're in, free plan, no payment details needed

Signup with Google or Email
Step 2: Name Your Store and Set the Basics
The first thing to do inside the dashboard is set your store name and basic details. This takes about five minutes and establishes the identity your customers will see.
Store name: Use your brand name if you have one, or your own name if you're a solo maker or creator. Keep it short and memorable, it'll appear in your store URL until you connect a custom domain.
Store description: Write one or two sentences about what you sell and who it's for. Think of it as the answer to "what is this store?" for a first-time visitor. Example: "Handmade ceramic homewares made in small batches. Every piece is unique."
Store logo: Upload your logo if you have one. If not, a profile photo or photo of what you sell will do. You can add a proper logo later.
What to do:
- Go to Settings → Store Details in your dashboard
- Enter your store name and tagline
- Upload your logo
- Save
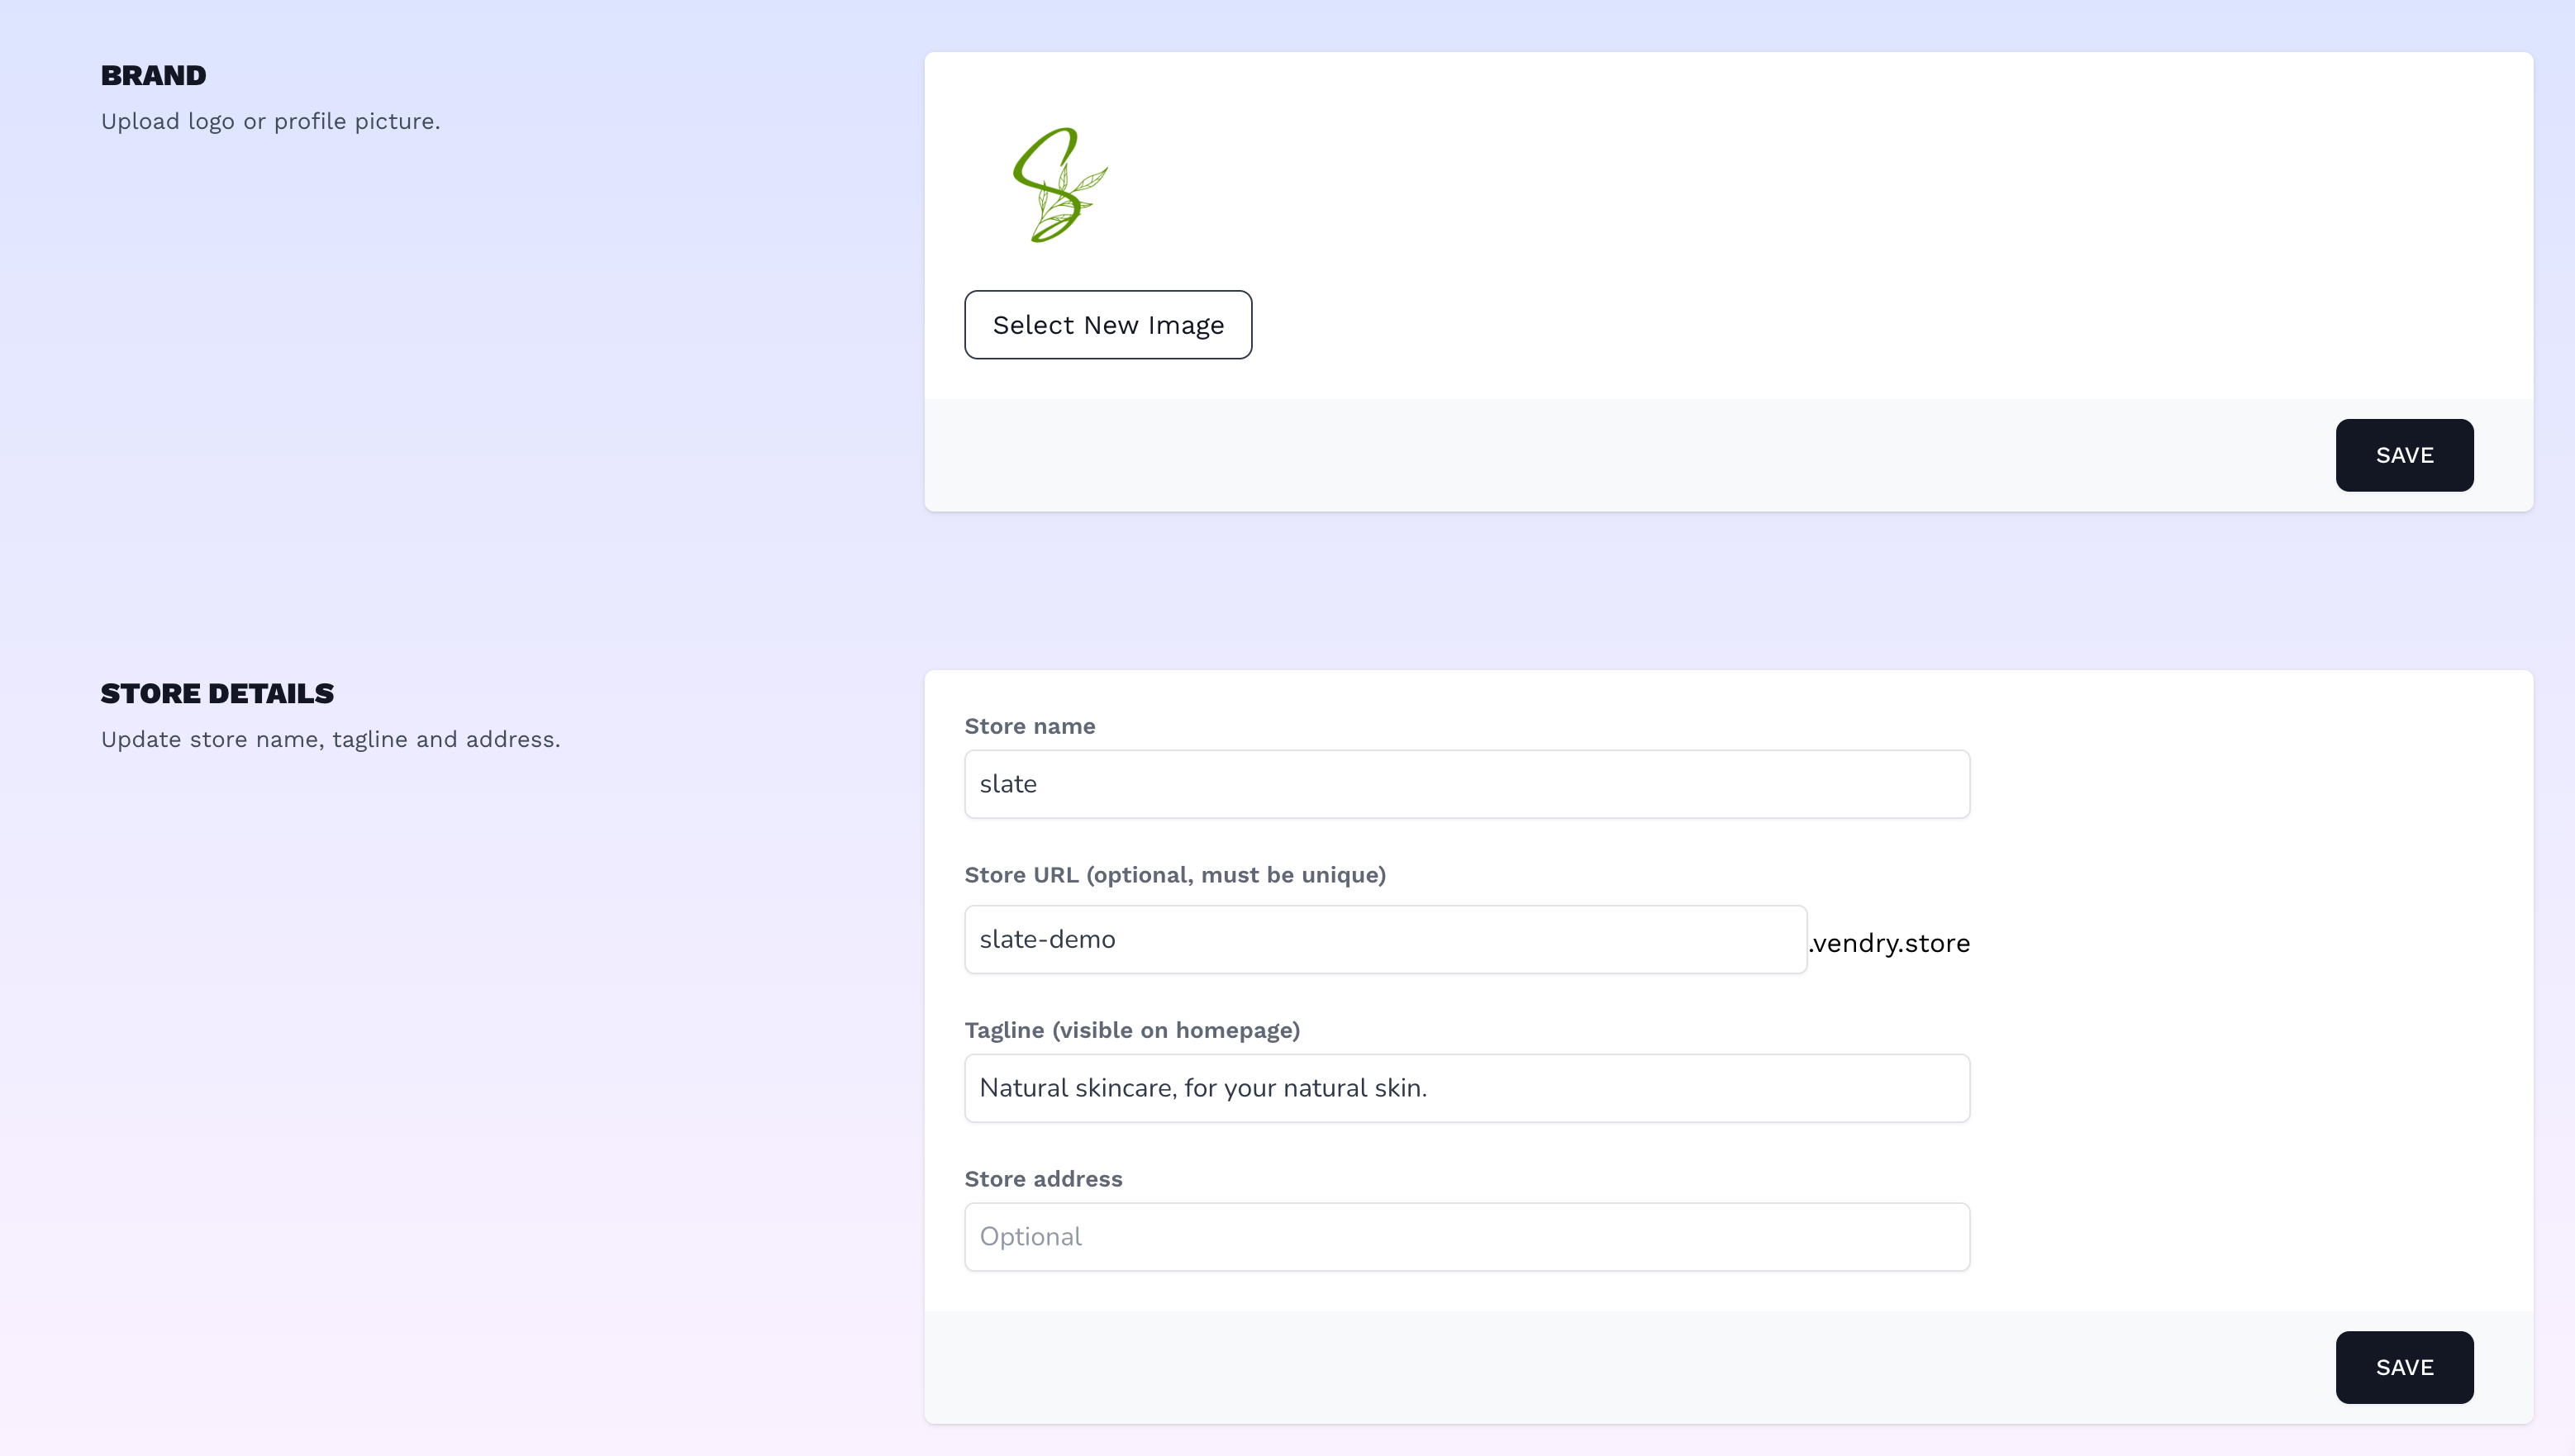
Store details dashboard - where you can upload logo, add store name, url and tagline
Step 3: Add Your Products
This is the core of your store. Take your time here, product descriptions and images are the two biggest factors in whether visitors become buyers.
On the free plan, you can add up to 5 products. That's enough to launch a real store, especially if you're testing a new product range or running a focused shop with a small catalogue.
For each product:
Product name: Be specific and descriptive. "Handmade Leather Card Wallet — Dark Brown" is better than "Card Wallet" for both SEO and clarity.
Product description: Write two to four paragraphs. Cover what it is, what makes it special, what it's made from, dimensions or sizing, and anything a buyer would want to know before purchasing. Don't bullet-point your way through this, prose converts better because it sounds like a real person talking about something they care about.
Product photos: Upload your best image first, this is what appears in the catalogue view. On the free plan, you get one image per product. Make it count: clean background, good lighting, the product filling most of the frame.
Price: Enter the price you want to charge. You can also set a "compare at" price to show a crossed-out original price if you're running a sale.
Variants: If your product comes in different sizes, colours, or materials, add those as variants. Each variant can have its own price and stock count.
Stock: If you have limited quantity, set a stock number. When it reaches zero, the product automatically shows as out of stock.
What to do:
- Go to Products → Add Product in your dashboard
- Fill in the product name, description, price, and variants
- Upload your product photo
- Set stock quantity if relevant
- Click Save and publish
- Repeat for all your products (up to 5 on the free plan)
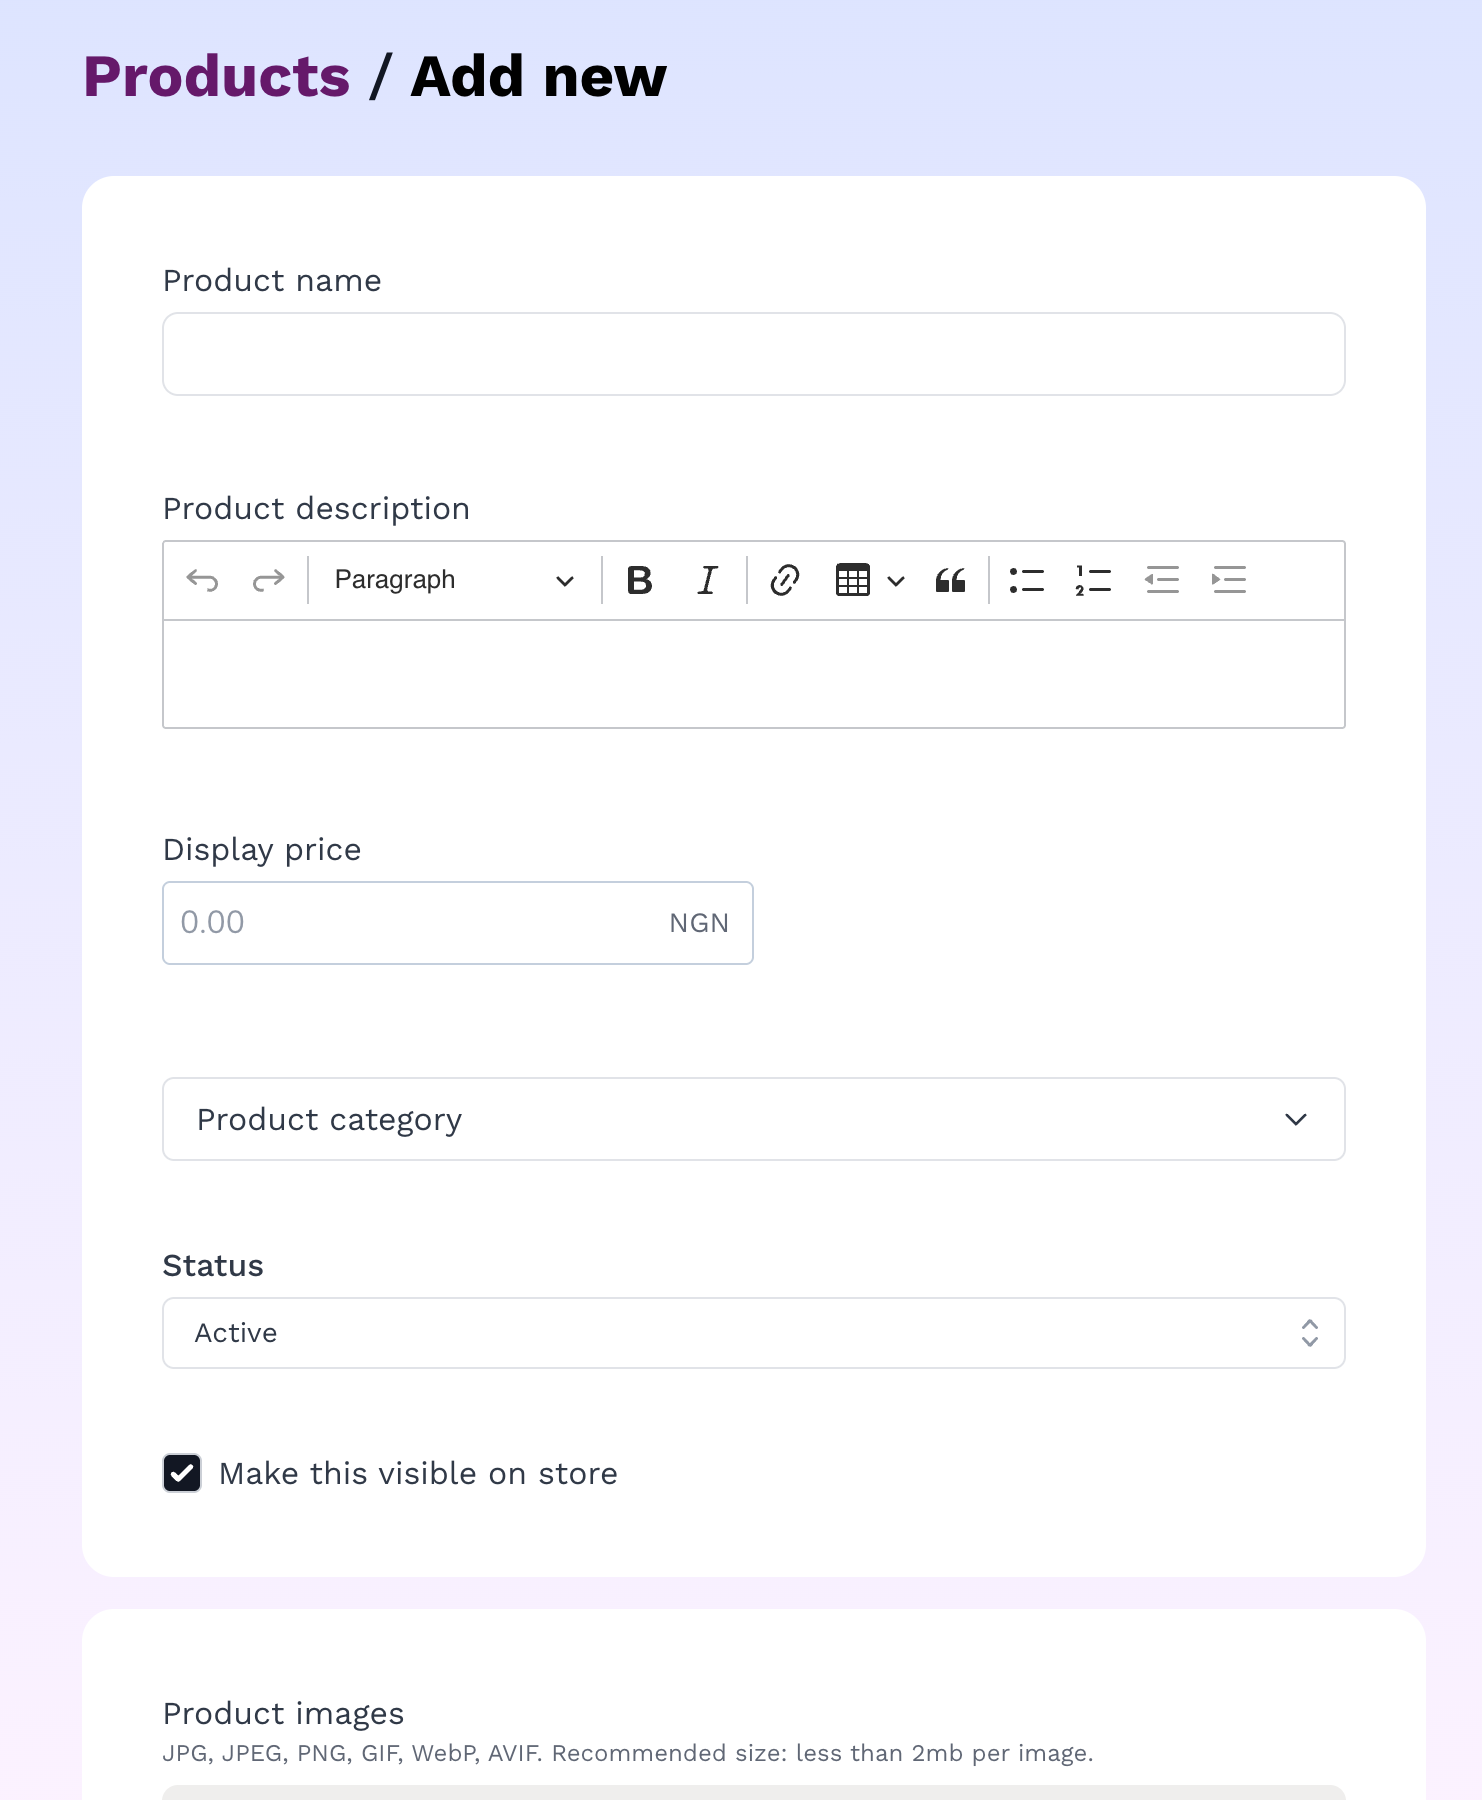
When you click "add product" you are directed to this page to add new product
Step 4: Choose a Design Theme
Your store's visual design is the first thing customers judge you on. A clean, professional-looking store builds trust before a customer has read a single product description.
Vendroad's free plan includes access to the default design theme, that you can customise and make your own. But if you want to explore other themes, choose a theme that matches your product type:
- Clean, minimal themes work well for photography, art prints, jewellery, and ceramics; products where the image should do the talking
- Bold, structured themes work well for food, retail products, and anything where you want to showcase multiple products clearly
- Lifestyle themes work well for clothing, home goods, and brands with a distinct aesthetic
Don't overthink this. Pick something that feels close to what you want, you can customise colours, fonts, and layout in the next step, and you can change themes entirely at any point.
What to do:
- Go to Store Settings → Store Design
- Preview two or three themes
- Click Apply on the one you want
- Your store now has a design you haven't published anything publicly yet

Store design settings showing available themes. Select one to customise
Step 4: Customise Your Store's Look
Once you've chosen a theme, spend a few minutes adjusting it to match your brand. You don't need design skills for this, it's mostly colour and font choices.
Colours: Most themes let you set a primary colour (your brand colour) and a secondary colour. If you don't have brand colours yet, pick something clean. White background with a dark accent colour almost always works.
Fonts: Choose something readable. Avoid anything too decorative for body text, so buyers can easily read and checkout.
Homepage banner: Most themes have a hero section at the top of the homepage; a large image with a headline and a button. Use a good product photo here, or a lifestyle image that represents your brand. The headline should say what you sell and who it's for (Your tagline in . The button should link to your product catalogue or a featured collection.
What to do:
- Go to Store Design → Customise in your dashboard
- Set your primary colour and font
- Upload a homepage banner image
- Preview on mobile, check it looks right on a small screen
- Save & publish
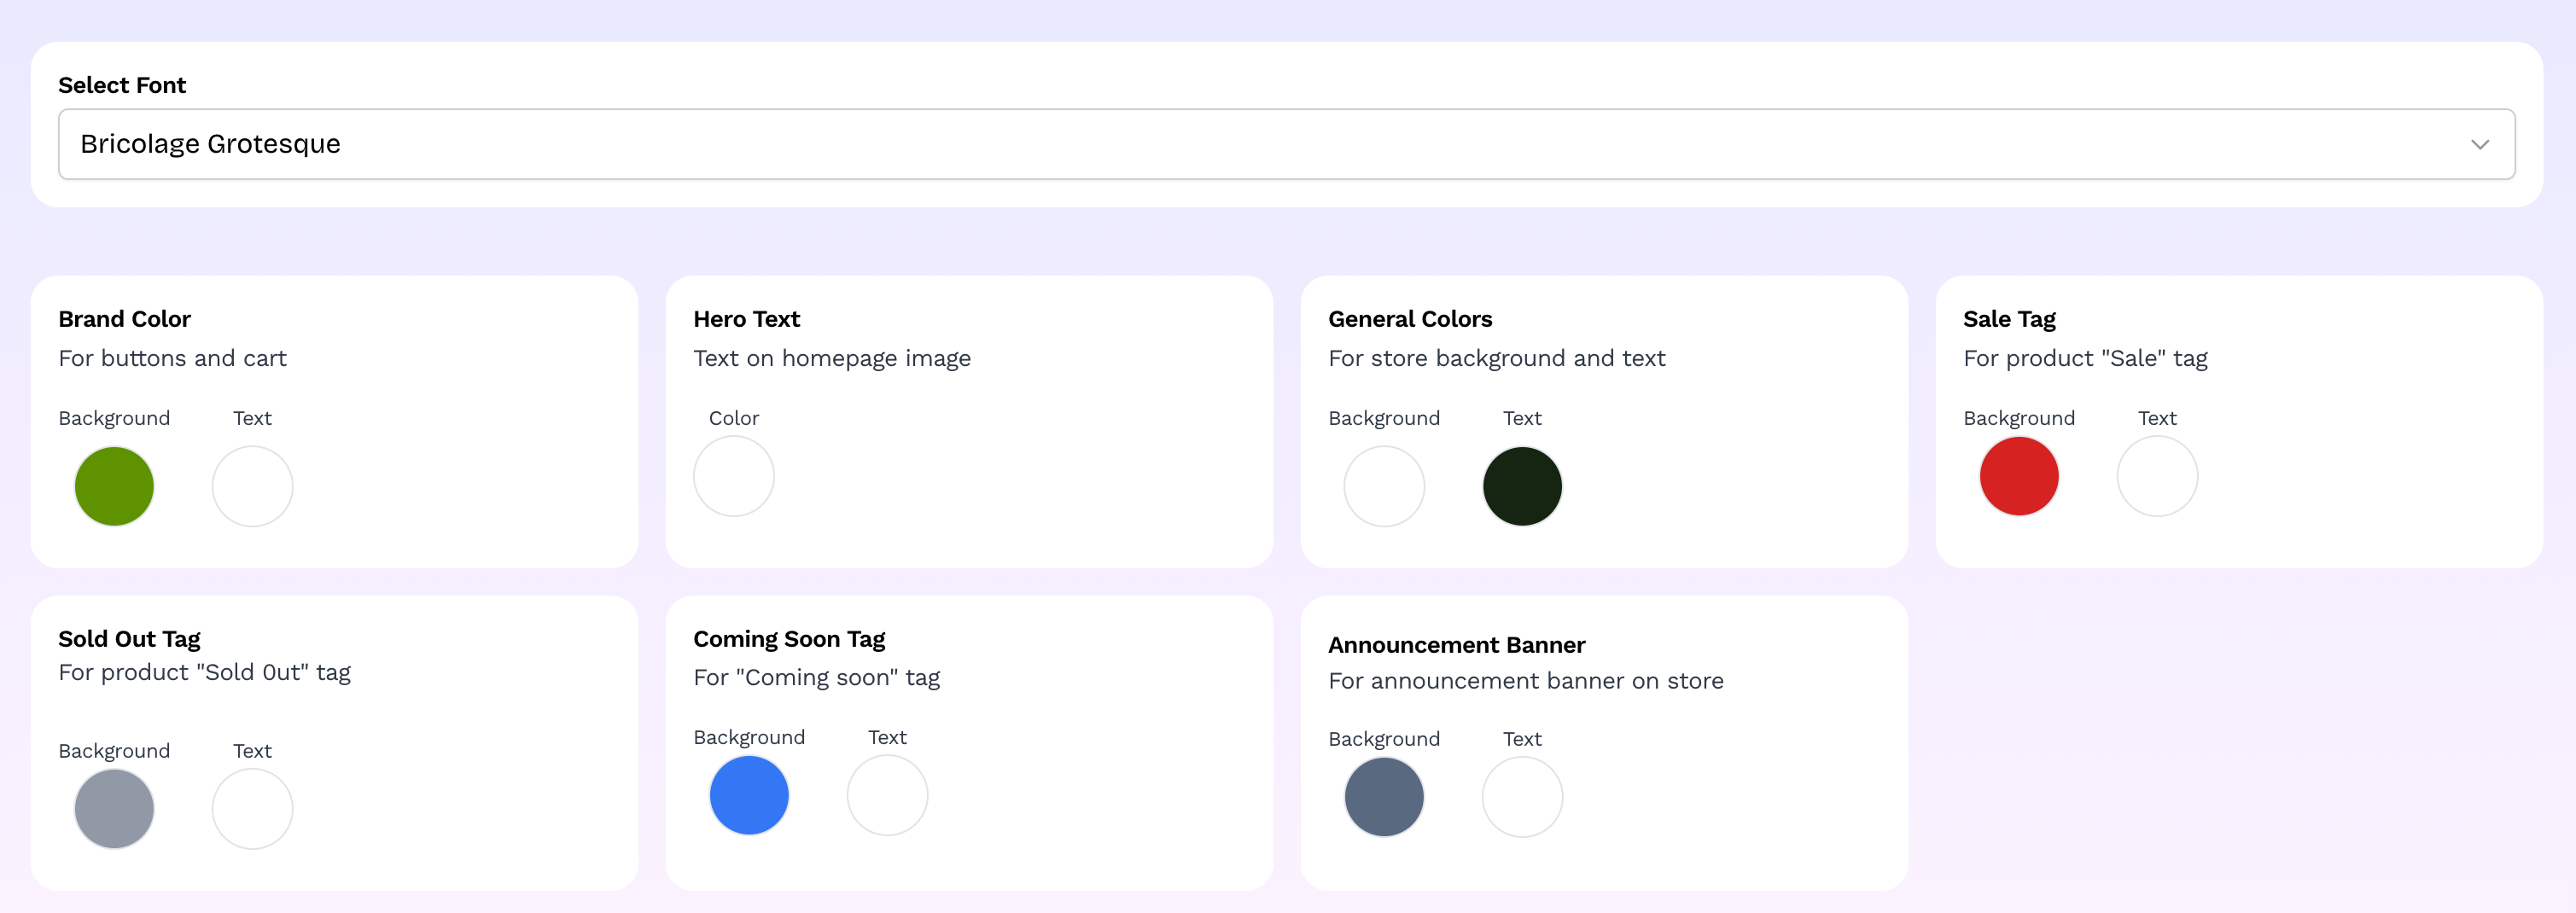
Customise colors and font. Themes come with default colors. Most important to change is the brand color.
Step 6: Set Up Payments
Without this step, customers can browse your store but can't buy anything. Payment setup takes about five to ten minutes and only needs to be done once.
Vendroad uses Stripe for card payments. Stripe is free to set up and charges no monthly fee, it takes a standard processing fee of 2.9% + $0.30 per transaction (rates vary by country), which comes out of each sale automatically. There are no additional platform transaction fees on Vendroad.
You'll also see options for accepting bank transfers and setting up cash on delivery if relevant to your market.
What to do:
- Go to Settings → Payments in your dashboard
- Click Connect Stripe
- You'll be taken to Stripe's setup flow, create a Stripe account or log in to an existing one
- Follow Stripe's prompts to enter your bank account details for payouts
- Return to Vendroad; payments are now live on your store
- Optional: enable invoice or cash on delivery as additional payment options
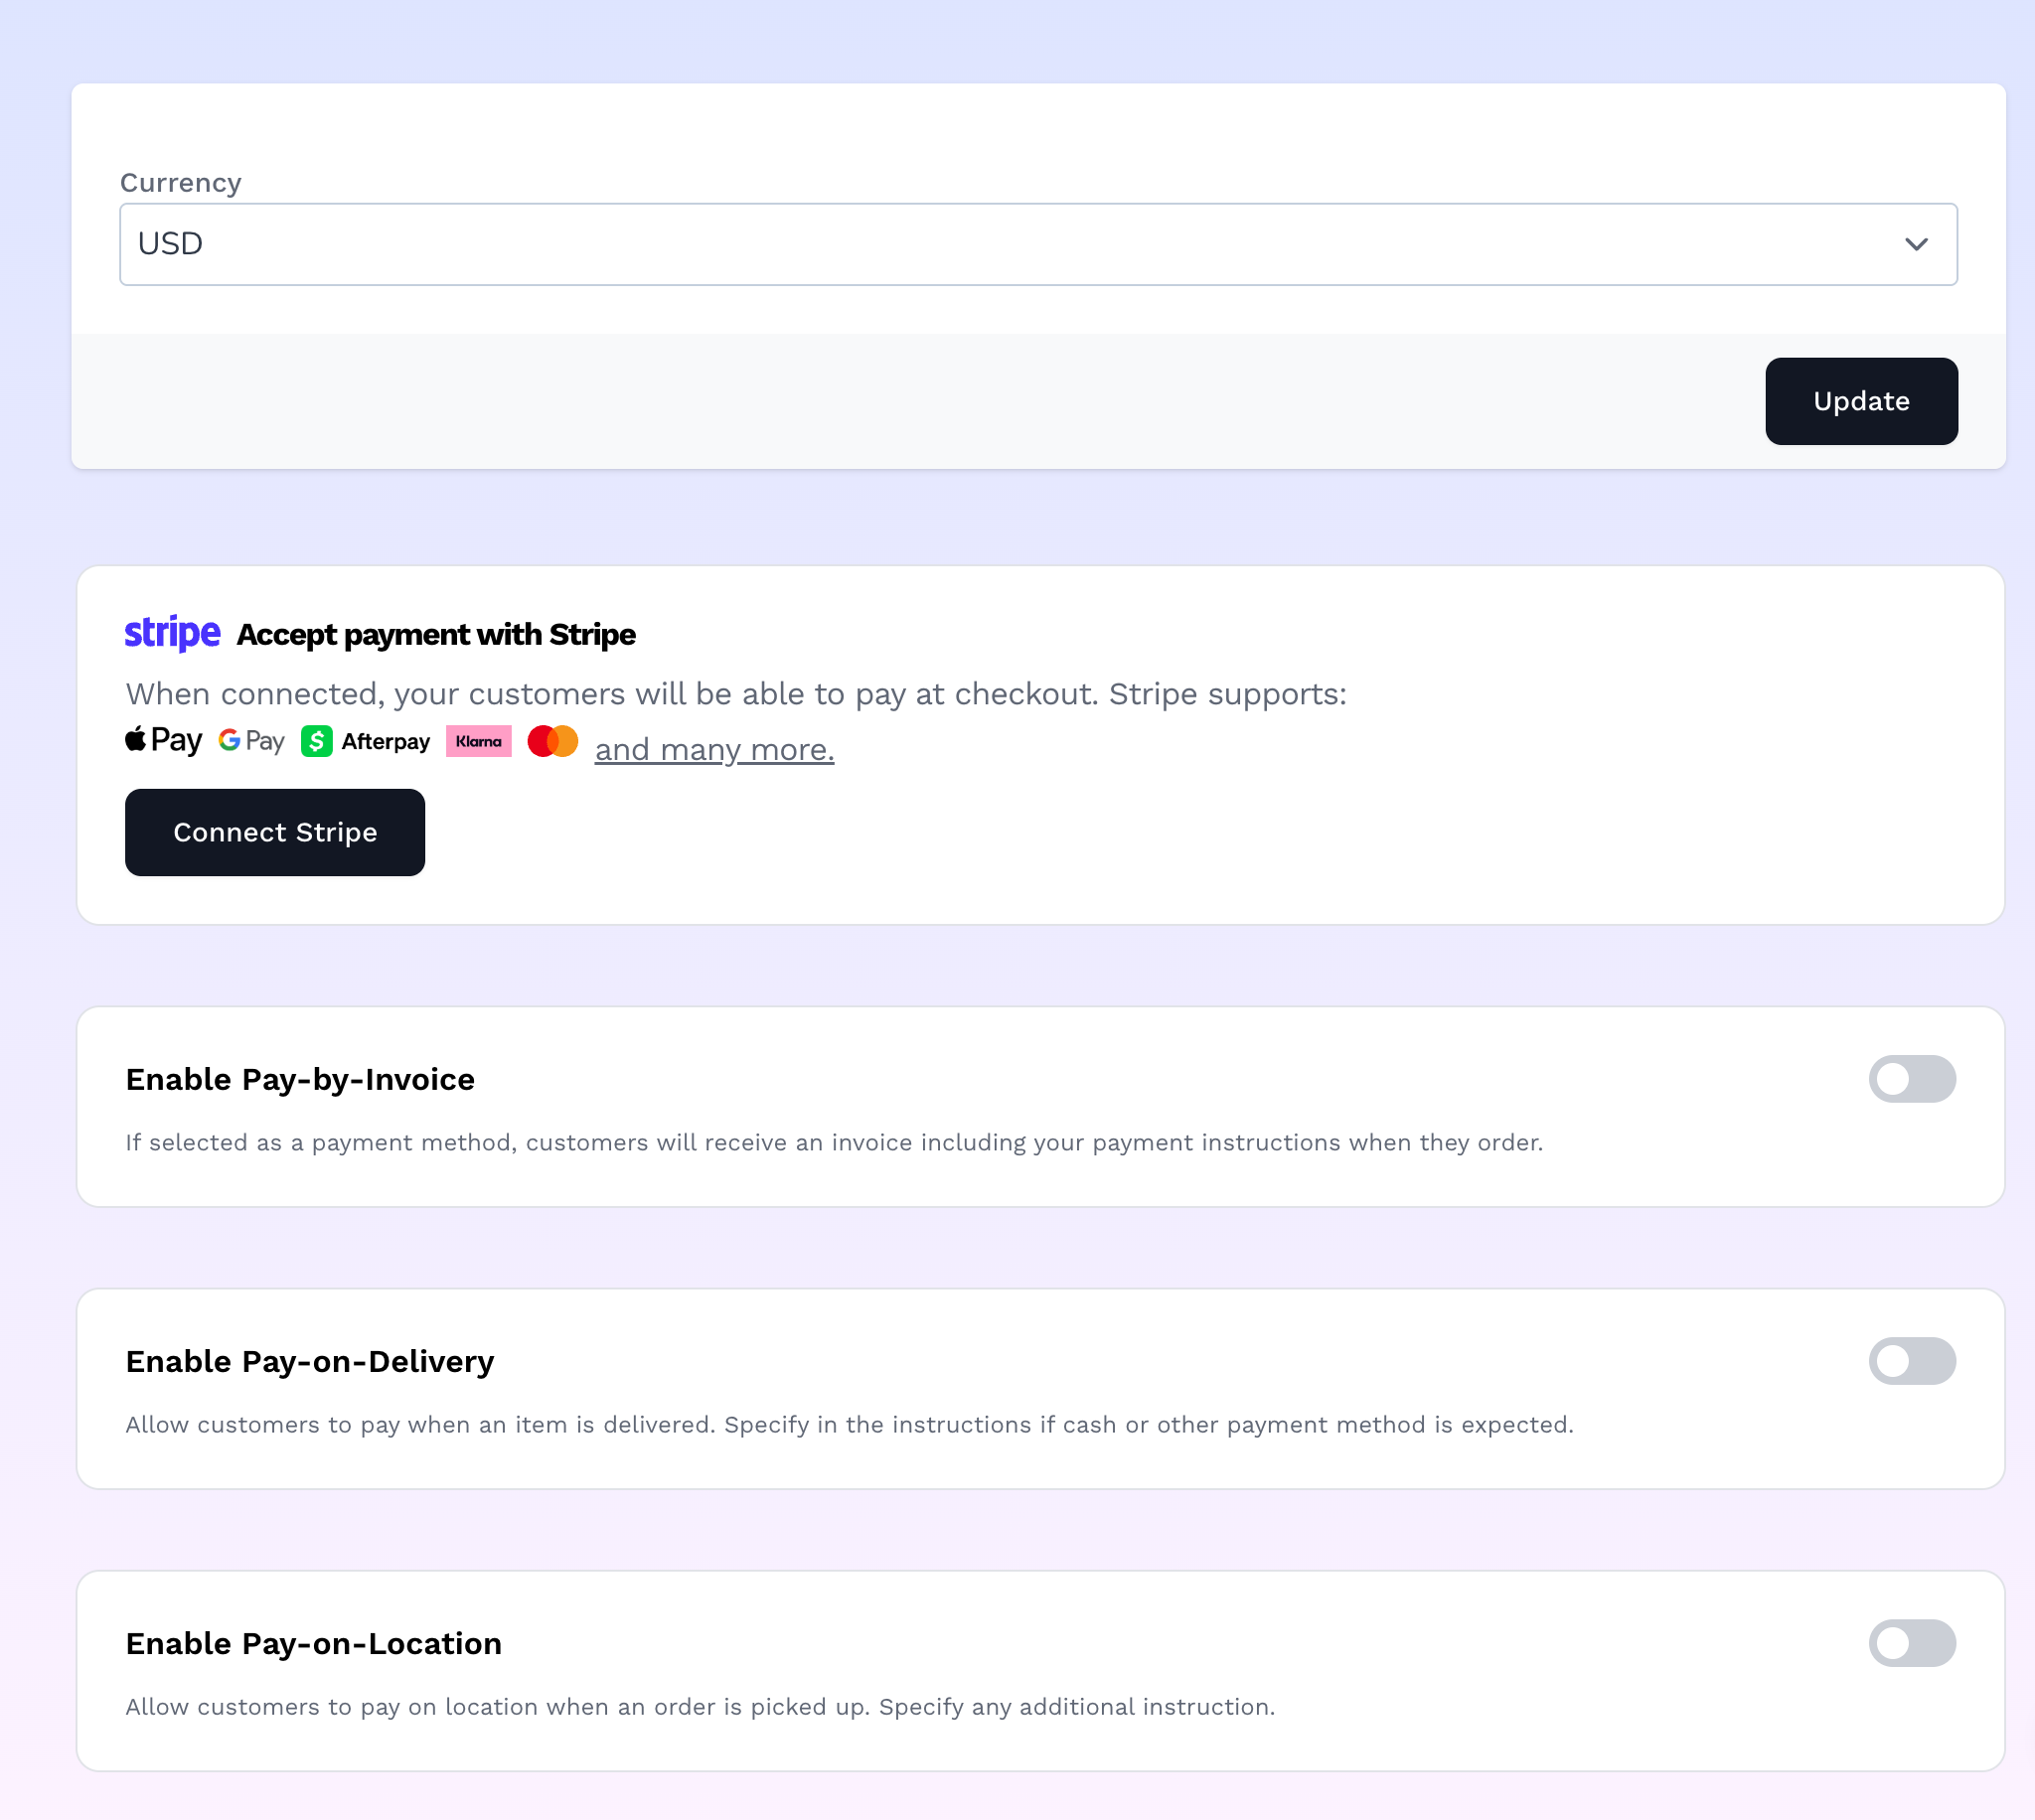
Depending on your currency, available payment options may differ. For countries that support stripe, connect with stripe or enable other methods.
Step 7: Configure Shipping
Every order needs a shipping configuration, even if you offer free shipping, you need to tell the platform that explicitly.
Common setups for small businesses:
Flat rate shipping: You charge the same shipping fee on every order regardless of size or weight. Simple and predictable. Good for most small shops.
Free shipping: You absorb the shipping cost into your product prices. Good for improving conversion, customers are more likely to complete checkout when shipping is free.
Free above a threshold: Free shipping on orders over $50 (or whatever your threshold). Encourages larger orders.
Local pickup / delivery: If you're a local business, you can offer an in-store pickup or local delivery option. Good for food businesses, local makers, and anyone with a physical presence.
What to do:
- Go to Settings → Shipping in your dashboard
- Choose your shipping model (flat rate, free, or mixed)
- Enter your shipping rate(s)
- Save
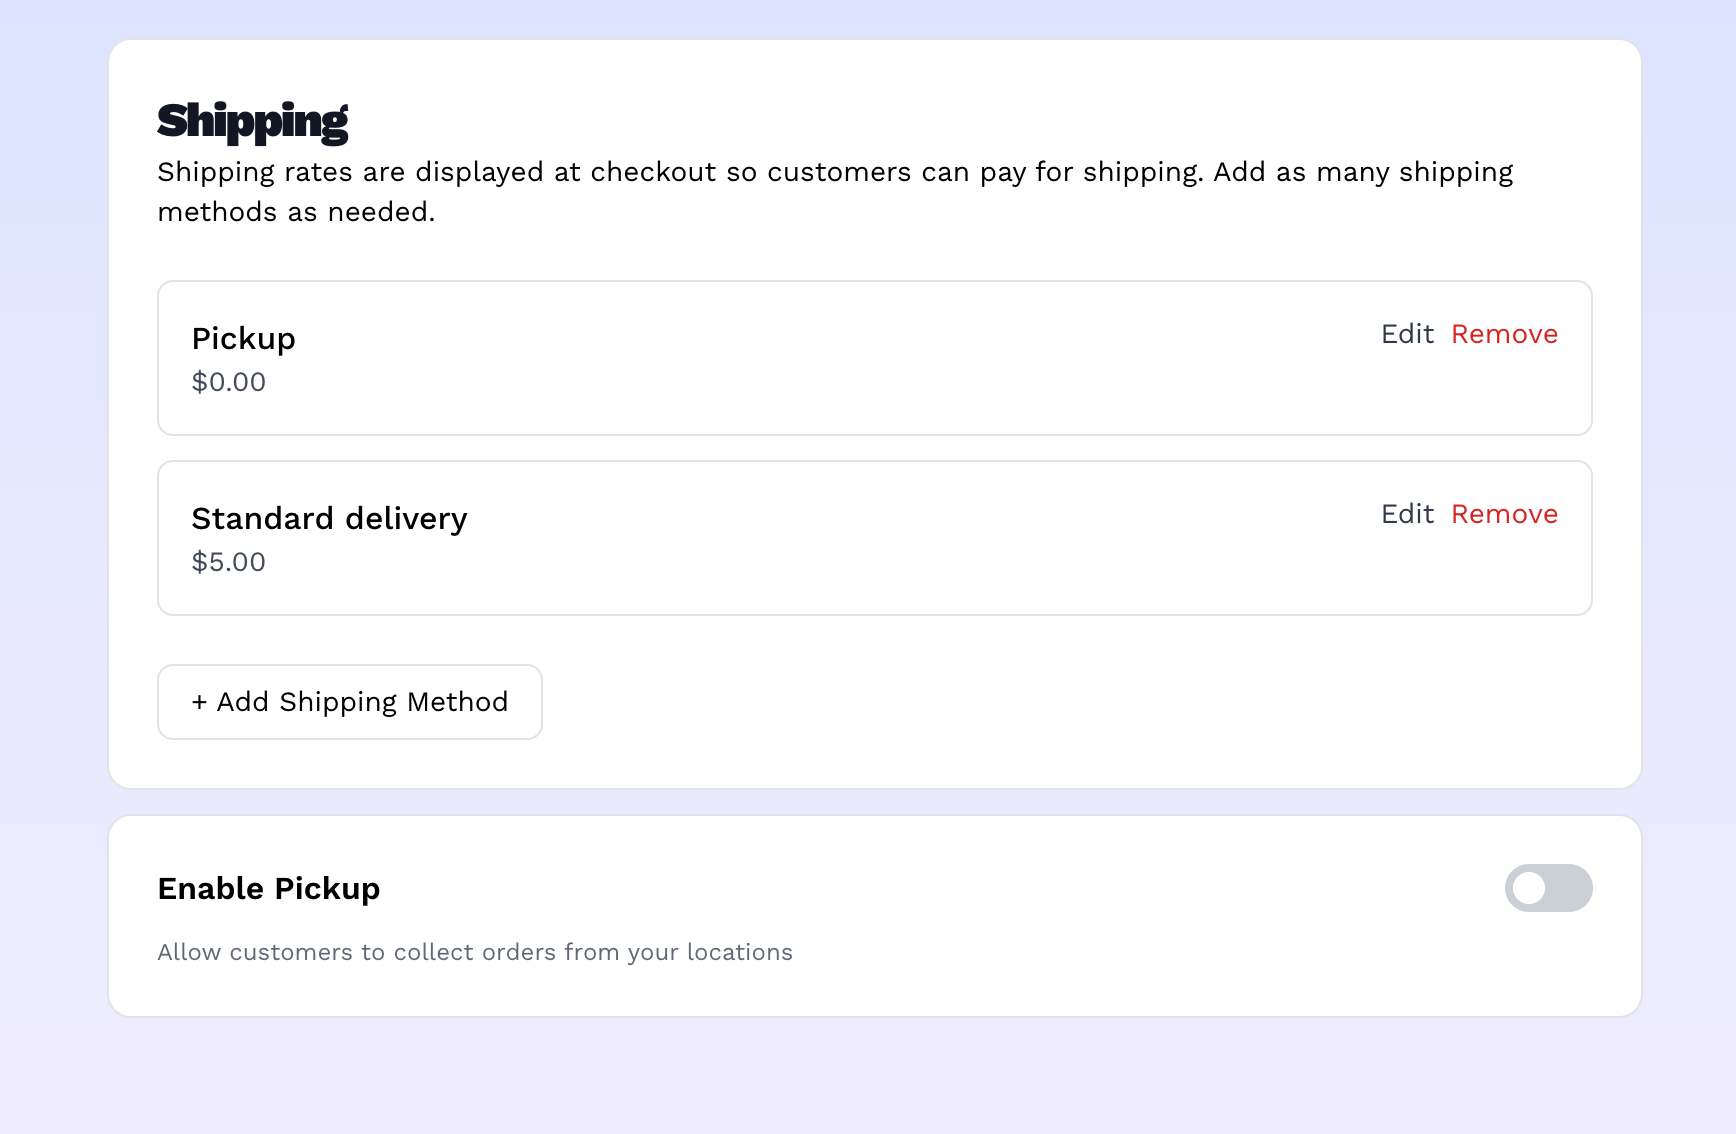
Shipping rates set here show up at checkout for customers to select
Step 8: Preview and Test Your Store
Before you share your store with anyone, spend five minutes testing it as a customer would.
Go through the full purchase journey:
- Visit your store homepage
- Click on a product
- Add it to the cart
- Go through checkout
- Complete a test purchase using even if only $2 worth to test
- Check that you receive an order confirmation email
Also check your store on your phone. Most of your customers will browse on mobile. Vendroad's themes are designed to be mobile responsive out of the box. But if something looks off, contact our customer service and someone will help immediately.
Things to check:
- Homepage looks professional and loads quickly
- All product images are displaying correctly
- Product descriptions are complete and readable
- Add to cart and checkout work without errors
- Order confirmation email arrives (check your inbox)
- Everything looks right on mobile
Step 9: Get Your Store URL and Share It
On Vendroad's free plan, your store lives at a vendry.store subdomain — something like yourstorename.vendry.store. This is shareable and fully functional. You can put it in your Instagram bio, share it on WhatsApp, add it to your business card, and start taking orders.
If you want your store at your own domain (like yourbrandname.com), that's available on the Starter Plan at $7/month. But you don't need a custom domain to start selling, the subdomain works just fine for launching and getting your first sales.
To find your store URL:
- Go to Dashboard
- Your store URL is listed there — copy it
- Open it in a new browser tab to see your live store
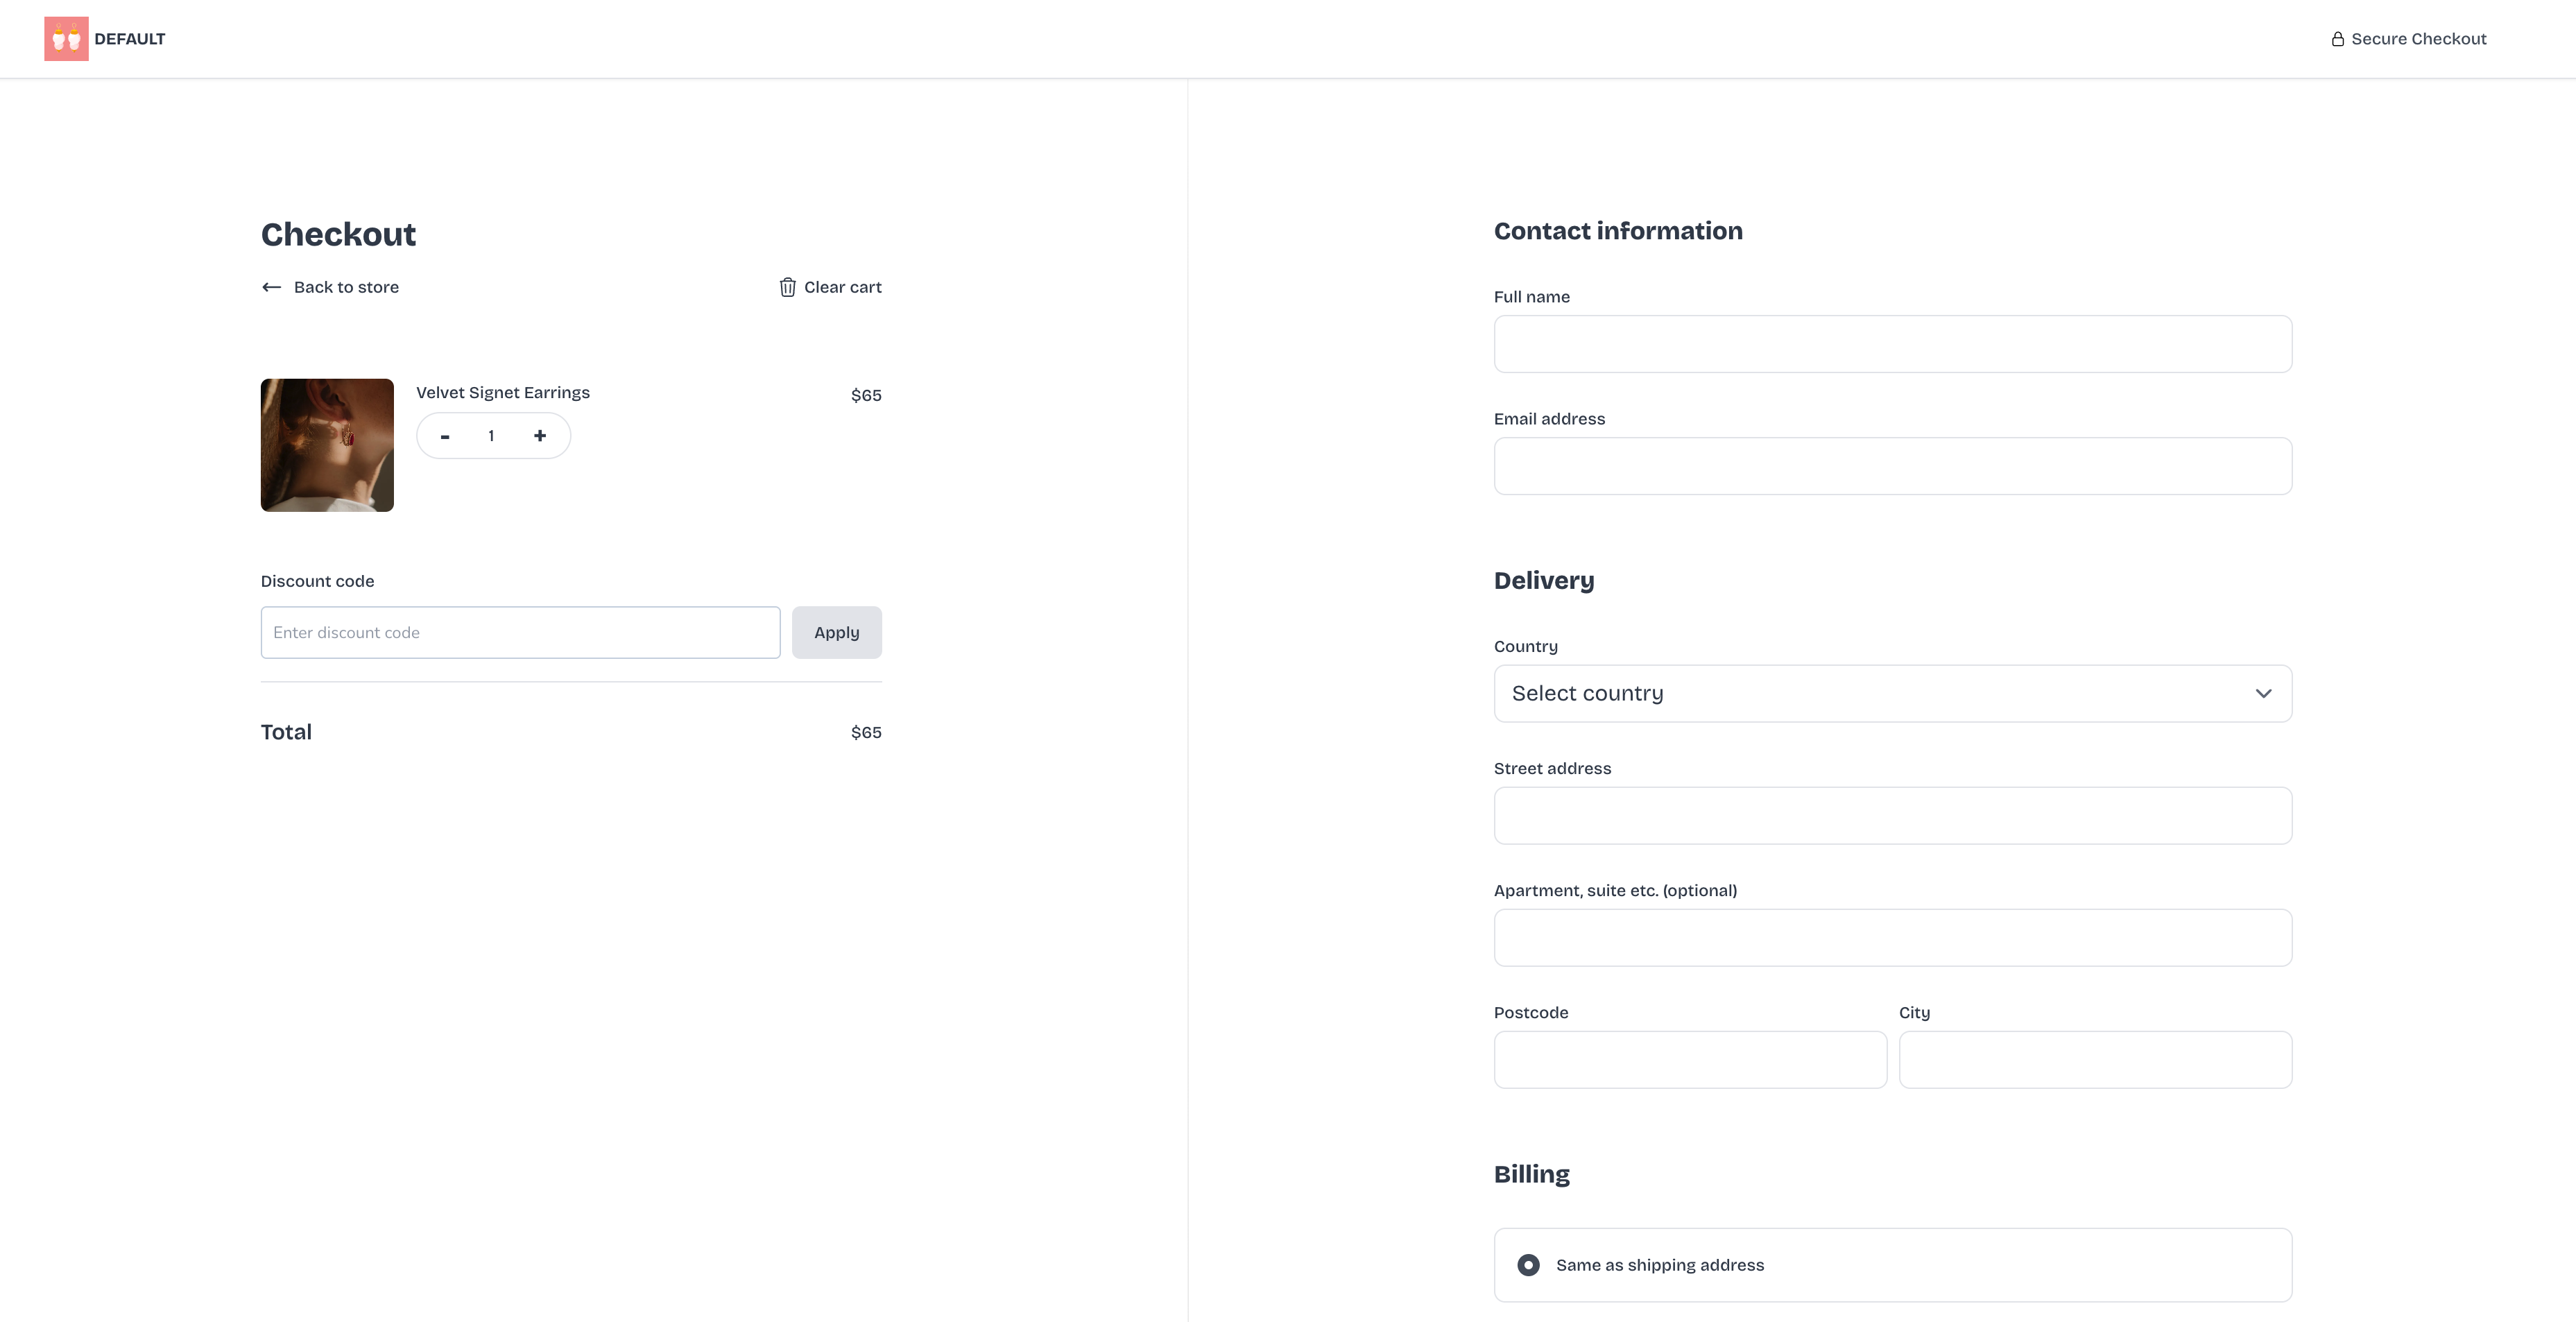
Checkout page example. Go through your checkout and experience it like a buyer
Step 10: Turn on Crisp / WhatsApp Chat
This is a step most people skip, and they shouldn't. Chat is included on Vendroad's free plan, and for small businesses selling handmade, custom, or higher-ticket products, it's one of the highest-converting features available.
Customers often want to ask a quick question before buying, about sizing, customisation, delivery time, or whether you can accommodate a specific request. Without a chat option, those customers leave. With WhatsApp or Crisp chat visible on your store, they message you instead, and a message is almost always a sale.
What to do:
- Go to Settings → Store design → Add on features. You will see both whatsapp chat and crisp chat as options there you can turn on.
- Switch it on. For whatsapp, you can enter your whatsapp number. For crisp chat, you need a crisp chat account
- Connect and save - this will make the chat bubble show up on your store.
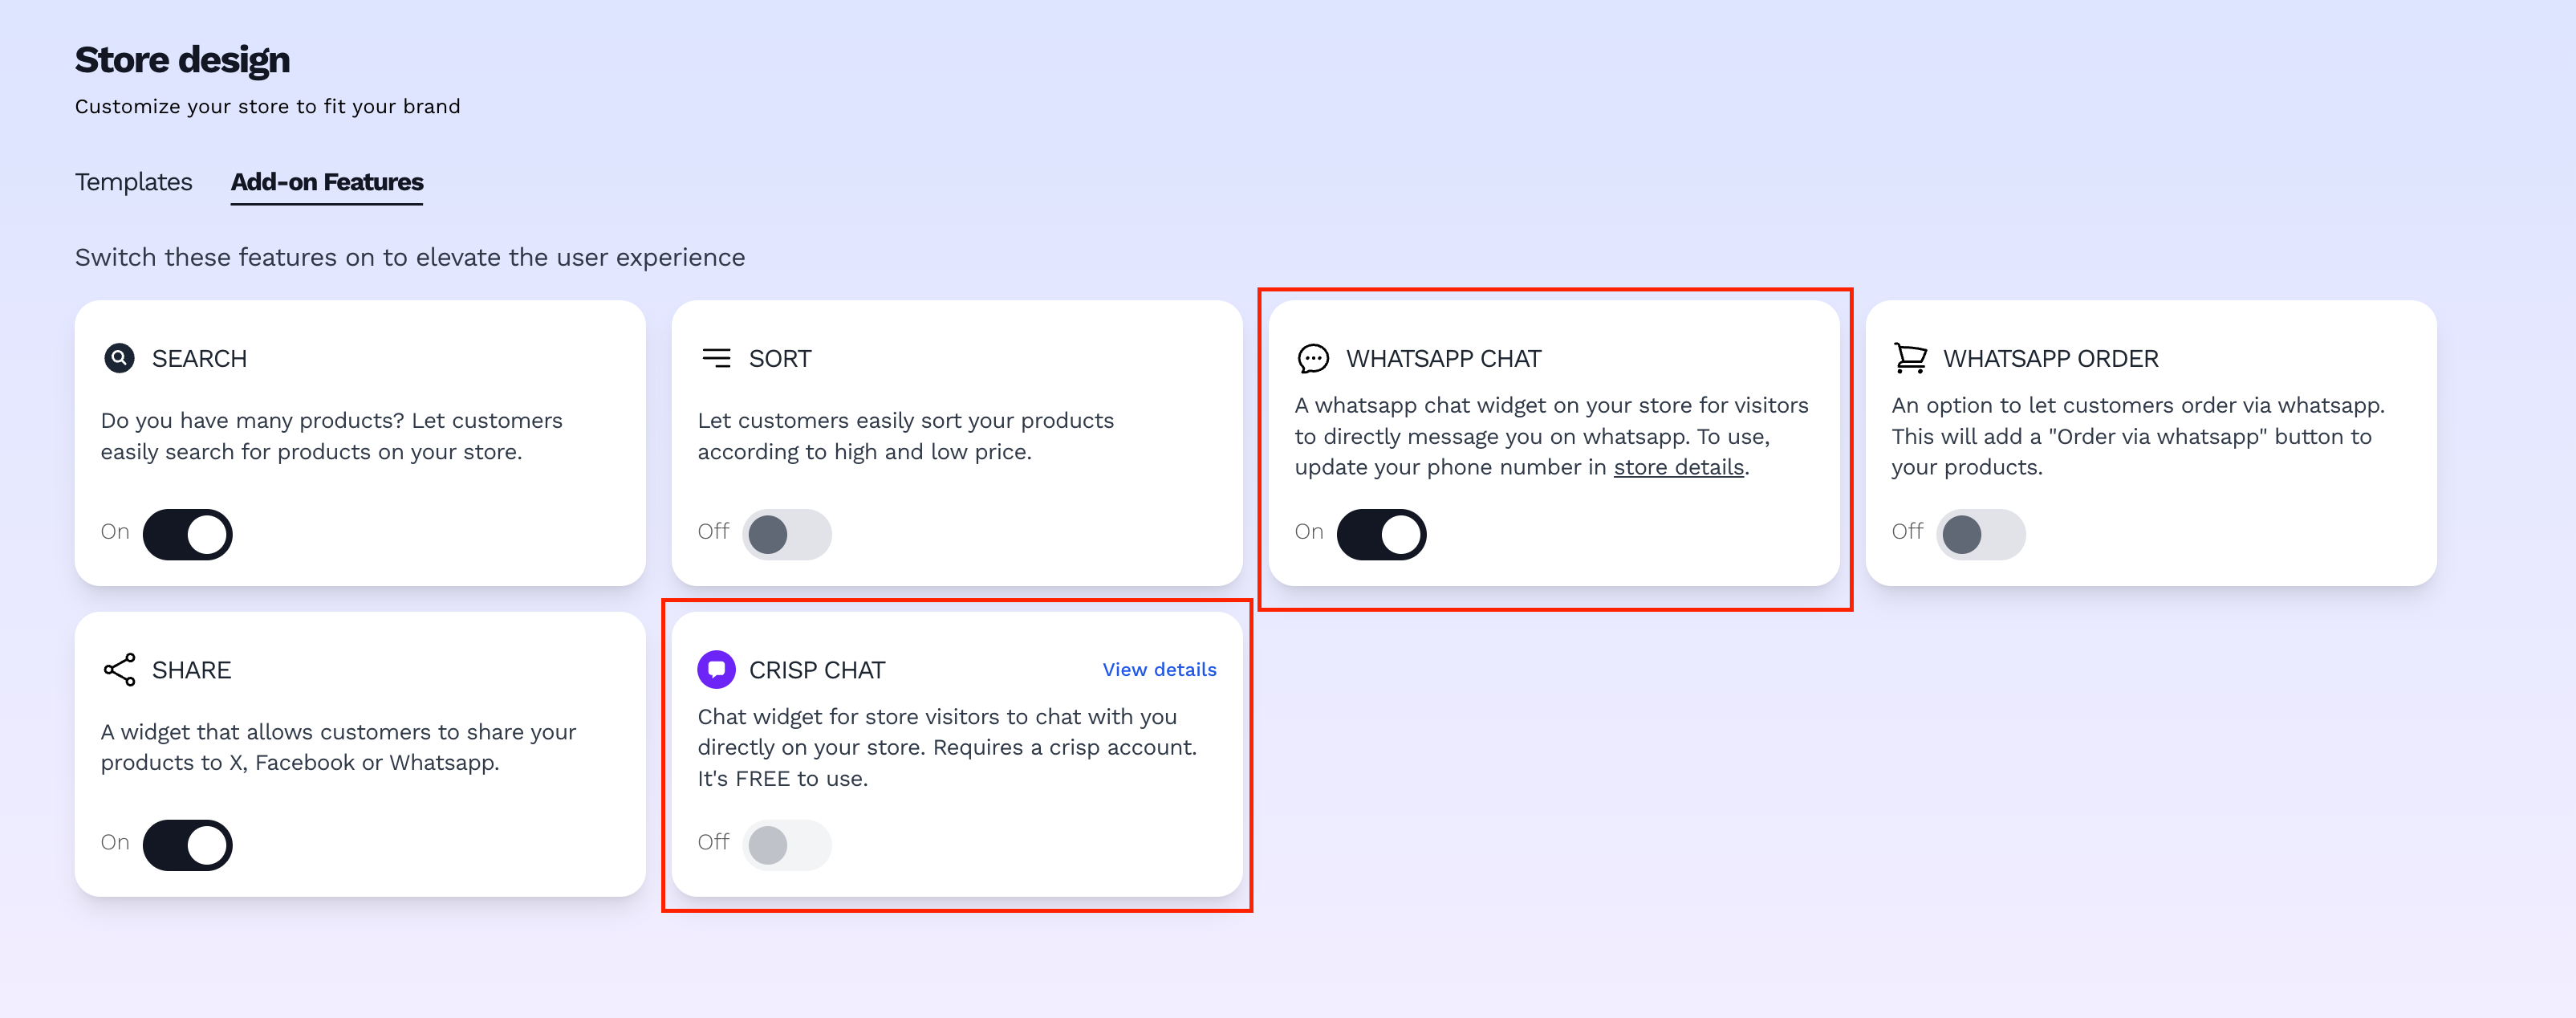
Switch on either whatsapp chat or crisp chat to always be able to communicate with customers
What You Get on the Free Plan
Here's exactly what's included — no trial, no expiry, no credit card required:
| Feature | Free Plan |
|---|---|
| Products | Up to 5 |
| Images per product | 1 |
| Payments (Stripe, Apple Pay, Google Pay) | ✓ |
| Shipping configuration | ✓ |
| Discount codes | ✓ |
| Order confirmation emails | ✓ |
| Design themes | ✓ |
| Design customisation | ✓ |
| WhatsApp chat | ✓ |
| Built-in SEO | ✓ |
| No listing fees | ✓ |
| Store URL (vendry.store subdomain) | ✓ |
| Custom domain | Pro plan ($7/mo) |
When to Upgrade
The free plan is a real, working store, not a demo. But there are a few moments when upgrading makes sense:
Upgrade to Starter ($7/month) when:
- You have more than 5 products to list
- You want to upload 6 images per product instead of 1
- You want your store at your own custom domain (yourbrand.com)
Upgrade to Pro ($15/month) when:
- You have more than 50 products
- You want to upload up to 12 images per product
- You want to be able to send delivery tracking email to customers
Both paid plans are month-to-month, you can upgrade or downgrade at any time. There are no long-term contracts.
Frequently Asked Questions
Can I really create an ecommerce website for free? Yes. Vendroad's free plan is permanently free, not a trial. You can list up to 5 products, accept card payments, configure shipping, and run a real online store at no cost. No credit card is required to start.
What are the payment processing fees? Stripe charges 2.9% + $0.30 per transaction (rates vary by country). This is a standard payment processing fee, it applies across all plans, including free. Vendroad doesn't add an additional transaction fee on top.
Can I accept payments on the free plan? Yes. Payment via Stripe (credit/debit cards, Apple Pay, Google Pay) is included on the free plan. You connect your Stripe account and payouts go directly to your bank.
What happens if I want more than 5 products? Upgrade to the Starter plan at $7/month to add up to 50 products, or the Pro plan at $15/month for unlimited products. Upgrading takes less than two minutes and doesn't affect your existing store or data.
Do I need a custom domain to sell? No. Your free store comes with a vendry.store subdomain that you can share, add to your Instagram bio, and use to take orders immediately. A custom domain (yourbrandname.com) is available on the Starter and Pro plan.
How long does it take to set up? Most people have a live, product-ready store in under an hour following this guide. If you have your product photos and descriptions ready before you start, it's often faster.
Is my store secure? Yes. All Vendroad stores include SSL certificates (the padlock in your browser's address bar), which encrypts customer data and is required for processing payments. It's included automatically on all plans.
Ready to start? Create your free store at vendroad.com — no credit card, no time limit, live in under an hour.